
When picking costumes for our family, we often consider what ideas are time-sensitive and can only be done while our kids are a certain age. That was the case with the "Where the Wild Things Are" costumes!
Our youngest was the perfect age to star as Max from “Where the Wild Things Are.” And since there were enough of us to fill the other wild things costumes, it was an obvious choice for our family.
Our “Where The Wild Things Are” costumes were a hit. They are completely doable for any level of Halloween costume creator. We sewed a few items and bought others, making these "Where the Wild Things Are" costumes the perfect match for each character. We loved using our imagination to bring the Wild Things to life! Each one has some silly features that were pretty fun to create.

Blog Post Navigation
This blog post is quite detailed, featuring a variety of "Where the Wild Things Are" costumes. We’ve done our best to provide clear instructions so you can easily create each look. Throughout the post, you’ll find buttons that help you jump to different sections, making navigation simpler. For instance, all the Wild Things use the same basic hat pattern, which is located further down. In each character’s section, you’ll find details on which pattern pieces and fabrics are needed. Once you know what’s required, you can click the button to go directly to the generic hat pattern instructions. For hats that require additional elements, like horns, you’ll be guided to the appropriate steps. There are also pattern tutorials for tails, claws, feathers, a yarn wig, and Max's crown. We’ve designed this guide to be as straightforward as possible to help you along the way as you create your own "Where the Wild Things Are" costume!
MAX

WILD THING 1

WILD THING 2

WILD THING 3

WILD THING 4


Free Sewing Pattern Download
You can download the free pattern pieces for all the costumes featured in this blog post. Simply print them at home to complete your own "Where the Wild Things Are" costumes!
Max Costume
Max is the focus and the reason we chose "Where the Wild Things Are" costumes for our family. Our little guy was the perfect age, we just had to do it!
His "Where the Wild Things Are" costume came together rather quickly. It has a couple of sewing patterns that we created to complete the Max costume. We used a brown, long faux fur for his crown lining and his tail. We made the crown from some gold cosplay fabric and his claws from cream faux leather.


Max: Crown
The crown for Max is essential to the costume! It is what makes the King of the Wild Things recognizable. For the crown, you need to have gold cosplay fabric, heavy-weight interfacing (to make the crown stand up), and some long brown faux fur. Below are the instructions to create the crown.
Crown Step 1: Prepare the Fabric
Start by cutting out all the necessary fabric pieces for the crown.
a. Cut 1 crown piece from heavy-weight interfacing.
b. Cut 1 strip of fur for the bottom edge of the crown.
c. Cut 2 rectangles from mystique gold fabric.

Crown Step 2: Pin the Crown and Gold Fabric Together
Now, layer the pieces together for stability.
a. Lay the two gold fabric rectangles together, with the crown interfacing on top of them.
b. Pin all three layers together to prevent slipping.

Crown Step 3: Trim Around the Fabric
Prepare for sewing by trimming the fabric.
a. Cut around the gold fabric, leaving enough seam allowance around the crown interfacing for sewing.

Crown Step 4: Sew the Gold Fabric
Next, sew the crown fabric together.
a. With right sides together, sew the two gold fabric pieces along the jagged edges using a 1/4" seam allowance.
b. Leave the bottom edge open.

Crown Step 5: Flip and Insert the Interfacing
Now, it’s time to flip and insert the interfacing.
a. Flip the sewn gold fabric right side out.
b. Insert the crown interfacing piece between the two layers of gold fabric.

Crown Step 6: Secure the Bottom Edge
Close the bottom of the crown.
a. Sew along the bottom edge to secure the interfacing inside the crown fabric.

Crown Step 7: Form the Crown
Create the circular shape of the crown.
a. Wrap the crown fabric into a circle, aligning the ends.
b. Sew the ends together to form the crown shape.

Crown Step 8: Attach the Fur Strip
Now, attach the fur to the bottom of the crown.
a. Pin the fur strip to the bottom edge of the crown, with the fur facing outward.
b. Brush the fur up and out of the way to create space to sew along the bottom edge of the crown and fur.

Crown Step 9: Sew the Fur Ends Together
Finally, secure the fur strip.
a. Hand-sew the top edge of the fur at the back of the crown to join the two ends of the fur strip together.

Max: Claws
We made claws using the claw sewing pattern. For Max, we made 3 claws for each foot (6 in total). We used cream faux leather for these claws. Then, we hand-stitched the claws to the feet of the onesie.
CLAWS SEWING INSTRUCTIONS

Max: Long Tail
For Max, we used the long tail pattern. We used it with the same long faux fur that we used for the crown fur strip. After we finished sewing our tail, we hand-stitched it onto the back of the onesie.
LONG TAIL SEWING INSTRUCTIONS

Max: Shop the Look

White Footed Pajamas
To really bring Max to life in a "Where the Wild Things Are" costume, white-footed pajamas with a hood are a must. Max’s suit is iconic, and the white pajamas capture that look perfectly. The footed style gives the costume a playful, cozy feel, just like what Max wears when he goes on his wild adventure. It’s simple, comfortable, and instantly recognizable as Max, which is what makes this the perfect base for the costume.

Large Buttons
We found some black buttons that were a great addition to Max’s costume. They didn’t match at first, so we spray-painted them white and then hand-sewed them onto the front of the pajamas. It was a simple way to add a little extra detail and make the costume look more like Max’s wolf suit. Little touches like this really help pull the whole look together.
Max: Boat
We made a boat for Max using a wood pallet for the base and attached a long straight stick in the corner with yellow fabric for the sail. It turned out to be such a fun photo prop! For Halloween night, it would be even more exciting to add caster wheels to the bottom and pull it around while trick-or-treating. Not only would it complete the "Where the Wild Things Are" costume, but it would also be a fun, interactive way to bring Max’s adventure to life as your little one collects candy!

Wild Thing 1 COSTUME
We chose this "Where The Wild Things Are" costume to be a "Where the Wild Things Are" adult costume. It all came together very nicely.
Wild Thing 1 is the first Wild Thing Max meets in the story. It is a big gray monster. It has a fuzzy head with horns and big ears. The silly features of this Wild Thing are the big people feet and the cute little duck tail!


Wild Thing 1: Hat
You will use the hat pattern with the horns and ears. The pattern for this specific hat has one extra step added in during the general instructions in addition to the add-ons.
For Wild Thing 1 hat, you will be using a Gray Faux Fur, some knit lining, and some cream faux leather. We used medium-length fur with a matching ribbed knit as lining.
HAT SEWING INSTRUCTIONS
Wild Thing 1: Duck Tail
Wild Thing 1 uses the duck tail pattern. We used the same gray fur fabric that we used for the hat. Then, you will use some thick interfacing and poly-fil to finish it off. After the tail was completed, we safety-pinned it to the tracksuit pants.
DUCK TAIL SEWING INSTRUCTIONS

Wild Thing 1: Shop the Look

Grey Tracksuit
The tracksuit we bought is no longer available, but you will want to grab something with a nice texture. This one is similar and has a nice texture.

Barefoot Slippers
For our Wild Thing 1 costume, we bought these Feet Slippers. To add an extra touch to these, we painted the toenails white.
Wild Thing 2 Costume
This Wild Thing 2 is the other monster we chose for our "Where The Wild Things Are" adult costume in our group of "Where the Wild Things Are" costumes.
Wild Thing 2 is full of bright colors. With a yellow body and long, orange hair; this monster has some wacky traits. The duck feet and a tail are just a start!
In this tutorial, you will need to use the hat pattern, the duck tail pattern, and the yarn wig pattern.


Wild Thing 2: Hat
Wild Thing 2 is the simplest form of this hat pattern. There are no add-ons or extra steps. You could say, this pattern was made for this costume. We used a rusty orange faux fur to make the hat. Then, we lined it with a matching ribbed knit.
HAT SEWING INSTRUCTIONS
Wild Thing 2: Wig
To create this yarn wig, we used a rusty orange plush yarn. You want a thick blanket yarn. The yarn we used had a thickness gauge of 7. We bought ours from Joann Craft Store, but you can find a similar one on Amazon.
Wig Step 1: Prepare the Support Yarn
Start by cutting a piece of yarn to use as the support yarn.
a. Measure and cut a piece of yarn about 30 inches long (or adjust to fit comfortably around the crown of your head).
b. Set the support yarn aside for now.

Wig Step 2: Cut the Yarn Pieces
Next, you'll need to cut the yarn that will form the strands of the wig.
a. Cut approximately 130 pieces of yarn, each about 45 inches long.
b. Keep these yarn pieces organized to make the next steps easier.

Wig Step 3: Attach Yarn to the Support Yarn
Now, it's time to attach the yarn strands to the support yarn.
a. Fold one piece of yarn in half.
b. Wrap the folded end around the anchor yarn, creating a loop.
c. Pull the loose ends of the yarn through the loop and tighten it around the anchor yarn.

Wig Step 4: Adjust the Thickness and Fit
a. Repeat this process for each piece of yarn, attaching them one by one along the length of the anchor yarn.
b. Continue adding yarn until the wig is as thick as you'd like.
c. Once satisfied, adjust the support yarn to fit snugly around your head by knotting the support yarn.

Wild Thing 2: Duck Tail
For Wild Thing 2 you will also use the duck tail pattern. We used a yellow faux fur fabric that matched our yellow outfit. You will need a thick interfacing and poly-fil to finish off the tail. When the tail was finished, we safety-pinned it to the pants of our outfit.
DUCK TAIL SEWING INSTRUCTIONS
Wild Thing 2: Shop the Look

Chicken Feet
We found some stuffed yellow chicken feet that velcro around the ankles, and they’re a perfect addition to the yellow Wild Thing costume. They add a playful, 3D element that really brings out the character's fun and quirky vibe. The velcro makes them super easy to attach and remove, and they give the costume an extra layer of detail without being too bulky or uncomfortable.

Chicken Socks
To complete the look for the yellow Wild Thing with chicken-like feet, a pair of socks with chicken feet on them is a fun and easy addition. They add the perfect finishing touch to the costume, making the feet look more authentic without a lot of effort.

Chicken Outfit
A yellow lounge set is a great base for the Wild Thing that’s all yellow with chicken-like feet. The bright color matches the Wild Thing’s body from the book, and the comfy lounge set gives you the freedom to move around easily while still looking like the character.
Wild Thing 3 Costume
Wild Thing 3 is a big, fuzzy monster. It has a lion-like mane. So, we used long fur to create the hat and tail.
We went with some fun textures to make this costume stand out. We also bought some simple additions to the costume and crafted them to match the look we were going for.
For Wild Thing 3 you will need the hat pattern with horns, the long tail pattern, and the claw pattern. We also have a quick tutorial on the leggings for this costume.


Wild Thing 3: Hat
We made this Wild Thing 3’s hat with long faux fur. It helped the hat resemble the mane of Wild Thing 3. You will use the basic hat pattern and add horns. Use the big horns labeled Wild Thing 3.
HAT SEWING INSTRUCTIONS

Wild Thing 3: Long Tail
For Wild Thing 3 costume, we used the long tail pattern. We used the same long dark faux fur that we used for the hat. Make sure you pay attention to the directionality of the fur when cutting the tail.
LONG TAIL SEWING INSTRUCTIONS

Wild Thing 3: Claws
Using the claw pattern, you will cut out 4 claws for each foot (8 claws total). Then you will hand sew or hot glue then onto the Wind Thing 3 slippers.
CLAWS SEWING INSTRUCTIONS

Wild Thing 3: Shop the Look

Khaki Leggings
We bought khaki leggings as the base for recreating the Wild Thing with the yellow and orange striped shirt and feathery legs. The neutral color works perfectly to mimic the character’s feathered look, and it gave us a great canvas to add custom details. We drew a feather pattern with a sharpie on the entirety of them. After our pattern was drawn on, we randomly cut some of the shapes out with sewing scissors.

Black Tights
We added black tights underneath the khaki leggings because the leggings have feather holes cut into them. The tights make the whole costume more comfortable and warm, while still letting the feather details on the leggings stand out. It’s a simple fix that makes sure the costume looks just right and stays practical to wear.

Lace Sweater
We’re big fans of texture, so we hunted for a crochet-looking sweater to match our Wild Thing costume. Although the exact sweater we used is no longer available, it was ideal for the look we wanted, so we’re sharing it in case you find something similar. We dyed the sweater beige and threaded orange ribbon through the stitches to achieve the orange striped pattern. The result was a perfect match for the Wild Thing’s vibrant look and added a great texture to the costume.

Fuzzy Slippers
We used fuzzy slippers with claws on the front and glued the claws with beige fabric claws that we sewed over the top. It’s actually fine if the slippers end up being a bit big; the extra size helps enhance the monster look and adds to the overall effect.
Wild Thing 4 Costume
Wild Thing 4 is the most bird-like monster of our “Where The Wild Things Are” costumes. The hat and tail are “feathered.” We used our basic hat pattern with some additional feather add-ons and steps to give it a bird look. We also used a feather tail pattern and the claw pattern. For Wild Thing 4, we used white faux fur as the tail and the hat. We also used cream faux leather for the claws.
The overall costume for Wild Thing 4 is a beige color and we found the perfect sweater to use with a feathery texture.


Wild Thing 4: Hat
For Wild Thing 4, we made the hat out of the basic hat pattern. The add-on for this hat is a feather top. We made the feathers front the same white fur fabric that the hat is made from. This hat became a little top-heavy. To solve this problem, we added some fabric straps to each side of the feathers to the hat flaps. We made them long enough to tie as a bow at the bottom of our little Wild Thing's chin.
HAT SEWING INSTRUCTIONS
Wild Thing 4: Claws
Wild Thing 4 has 5 claws that go from big to small, just like toes. We used the same cream faux leather for these claws as with the other ones. Be sure to use the pattern for Wild Thing 4 for the claws.
CLAWS SEWING INSTRUCTIONS

Wild Thing 4: Feather Tail
This bird-like monster is so different from the other Wild Things! It has a feather tail that is made from the same white faux fur as the hat. The tutorial for this tail is below. When we completed the tail, we hand-stitched it onto the pants of our little Wild Thing 4.
Feather Tail Step 1: Preparing the Fabric
Start by laying out your feather tail fabric on a flat surface. Place the printed pattern on top of your fabric, securing it with sewing pins.
You'll need to cut:
- 8 feather tail pieces, cut as mirrored pairs (one piece should face forward and the other should face backward for each feather).

Feather Tail Step 2: Assemble the Feathers
With your fabric pieces cut, it's time to start sewing.
a. Take one feather piece and align it with the mirrored feather piece, right sides together.
b. Sew along the edges using a straight stitch with a 1/2" seam allowance.

Feather Tail Step 3: Turn Right Side Out & Add Filling
With the feathers sewn together, it’s time to turn it right side out.
a. Carefully flip the feathers inside out, so the right side of the fabric is now on the outside. Use a blunt object like a pencil or chopstick to help push out the tip of the feathers.
b. Once flipped, begin stuffing the feathers with polyfill or your desired stuffing material. Be sure to stuff evenly and firmly, so the feathers hold their shape.
c. Set the stuffed feather aside for the next step.

Feather Tail Step 4: Close the Bottom Opening
a. Pinch the raw edge of the feather's bottom opening, and use your sewing machine to sew along the edge. Once the bottom is securely closed, set the feather aside to attach later.

Feather Tail Step 5: Attach the Feathers to the Pants
Now that your feathers are ready, it’s time to attach them to the pants.
a. Fasten your feathers together at the bottom edge with either a safety pin or you can sew them.
b. Position the tail feathers at the center of the back of the pants just above the seat of the pants.
c. Using a needle and thread, hand-stitch the feather tail securely to the pants. Be sure to stitch through both the feather tail base and the pants fabric for stability. (Or you can use a safety pin)
d. Once the feather tail is attached, check that it is securely fastened.
e. Trim any excess thread and tuck it away for a clean finish.

Wild Thing 4: Shop the Look

Feather Sweatshirt
For this Wild Thing, finding the right textured sweater is key. We suggest using a sweater with a feathered knit pattern, which perfectly mimics the look of feathers while adding great texture. The sweater we found was dark yellow, but we spray-painted it (remove the collar first and reattach after spray-painting) to bring it closer to a khaki or beige color that better matched the Wild Thing. The end result captured the Wild Thing’s feathery body with the right mix of texture and tone.

Skirt Jeggings
These khaki jeggings are perfect for the costume, especially with the attached skirt. The color is spot-on, and the little ruffly skirt adds just the right amount of texture to capture the look we’re going for. It’s a simple addition that really enhances the overall effect of the Wild Thing’s feathered, textured body.

Big Foot Slipper
We used these big foot slippers as the base for the Wild Thing’s feet and then glued the claws over the toes to match the character's look. We lightly spray-painted the fur the same beige as the sweater. Having the slippers a bit oversized actually works in our favor, making the feet look extra large and wild, which really adds to the overall effect.
Wild Thing Face Paint
Adding face paint really pulled these costumes together. We have face paint that we love for Halloween costumes! It doesn’t smear and is easily removed with makeup removing wipes. We did some simple shapes and line face paint for each Wild Thing that added a unique touch.

Wolfe Face Art & FX
We absolutely love Wolfe face paint—it’s hands-down the best! The colors are so vibrant and really stand out, making any costume pop. What we love most is that it doesn’t smudge easily, so it stays put. If you’re looking for face paint that delivers intense color and long-lasting wear, Wolfe is definitely the way to go!
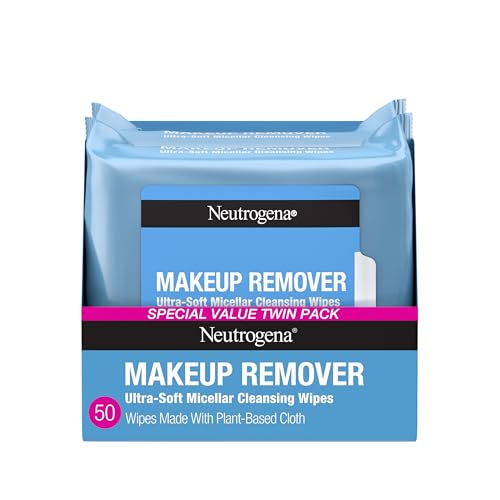
Makeup Remover Wipes
Since Wolfe face paint stays on so well, you’ll definitely want some makeup remover to take it off at the end of the night. We love using Neutrogena makeup remover wipes for this—they work like a charm!

Free Pattern Download
To complete the “Where The Wild Things Are” costumes you will need to download this pattern. Our free printable sewing pattern is designed to help you recreate all the pieces for each of the characters from the story. This comprehensive pattern includes everything you need, starting with the hat. It comes with various add-ons and is available in three sizes: Medium (for children), Large, and X-Large.
In addition to the hat pattern, you'll also find patterns for the claws and tail options. Each of these elements is offered in multiple sizes to ensure a perfect fit for every Wild Thing. With this free downloadable pattern, you can easily craft these fantastic costumes for you and your family.
To print your PDF sewing patterns, begin by downloading the pattern file to your computer or device. Open the file using a PDF reader Before printing, make sure to adjust the print settings to ensure that the pattern is printed at 100% scale. Look for options such as "Actual Size" or "No Scaling" in the print dialog box to maintain the correct dimensions. It’s a good idea to first print a test page that includes a calibration square to verify the scale accuracy. (Page 2, it has an A watermark and is the first page of the sewing pattern.)
Next, select the appropriate paper size—typically A4 or Letter—and avoid selecting options like "Fit to Page" or "Shrink to Fit," as these can distort the pattern. Print all pages of the pattern single sided. After printing, assemble the pattern by trimming any overlapping edges and matching the triangles on the center of each side. This will help the patterns be aligned. Then tape the pages together according to the layout guide. Finally, cut out the pattern pieces for each size you need, and you’ll be all set to start your sewing project.
To get your hands on our free pattern download, simply download it using the button below. For immediate access, subscribe to our newsletter by filling out the form provided. As a new subscriber, we will occasionally sprinkle your inbox with other fun family ideas, along with complimentary printables that have been released! Already subscribed? Just enter your email address below and click download without worries of being 'resubscribed' or receiving additional emails.
Enter Email for Free Download
"Where the Wild Things Are" Costume Memories
These costumes turned out better than we ever dreamed! We have been so excited to share them with you. To save these perfect memories, we have done a few different things over the years. With all of the time spent making Halloween costumes that are only worn for a few parties and trick-or-treating (and maybe a dress-up for the kids), we have always wanted to save the memories in a special way.
"Where the Wild Things Are" Costume Photo Shoot
For the past few years, we have been holding a Halloween costume photo shoot. We choose a location that aligns with our costume theme and do an onsite costume shoot. The pictures have been so fun to capture and look back on! It is one of our favorite ways to make the Halloween memories last forever.


Gallery Wall
With those pictures, we have done a couple of different things. We have made a gallery wall in our basement that displays our costumes from each year since we started capturing these. This is fun because it is near our TV where we watch movies. People love to admire the pictures of us all dressed up. We love that we get to have those memories right there!

"Where the Wild Things Are" Costume Keepsake Book
Another thing we did with our pictures for our “Where the Wild Things Are” costumes, is we made our own keepsake book. Similar to what we did when we recreated the book “Guess How Much I Love You,” we focused on taking pictures to bring the book to life. We focused our “Where the Wild Things Are” costume photoshoot on recreating the specific pictures from the book.

This was not only a memorable moment, but it was such a fun activity for our family! The kids absolutely loved acting out the pictures of Max and the Wild Things, and they loved watching their parents do it too!
This book has become not only a favorite bedtime story but a family treasure for us. Hopefully, you can take these ideas and make them a reality for your family too!

We created the free patterns because we only hope that everyone who tries to recreate our “Where the Wild Things Are” costumes can make costumes just as perfect as ours. Then, you can capture these memories with your family as well.
More Halloween Fun
If our “Where the Wild Things Are” costumes aren’t for you, check out our other group costume ideas here. We have had many years of creating family costumes for each of our families, so there are many options.

Family Costume Ideas
Is it too close to Halloween for you to recreate these costumes? Check out our blog post about Last Minute Halloween Costumes. Here we have plenty of quick, cute, and fun Halloween costumes that can be thrown together with things you probably have around your house.

25 Last-Minute Halloween Costumes
Finally, however you choose to dress up, we have some great Halloween Dinner Ideas that will turn your festivities into a spooky delight! Happy Halloween!

Food Ideas for Halloween Dinner
For more fun ideas and inspiration, follow us on Instagram at @DIYFamilyTime and check us out on Pinterest!
Pin-worthy Inspiration
If you liked this post, help us out by pinning this post using the “Pin it” button below!


Generic Wild Thing Hat Sewing Guide

Hat Step 1: Preparing the Fabric
Start by laying out your outer and lining fabrics on a flat surface. Place the printed pattern on top of each fabric, securing it with sewing pins.
You'll need to cut:
- 2 side flap pieces from the outer fabric (mirrored) *Note: Wild Thing 1 is LINING fabric
- 2 side flap pieces from the lining fabric (mirrored)
- 1 center strip from the outer fabric
- 1 center strip from the lining fabric

Hat Step 2: Assemble the Hat Lining
With your fabric pieces cut, it's time to start sewing.
a. Take one side flap piece and align it with the center strip, right sides together.
b. Sew along the edges using a straight stitch with a 1/2" seam allowance.
c. Repeat this process with the other side flap piece, attaching it to the opposite side of the center strip. You should now have the shape of the hat.

At this point, you may need to complete an accessory for your hat. Select the button below that corresponds to your specific Wild Thing to follow the instructions for that accessory. Once finished, you’ll be redirected back to this sewing guide to continue assembling your hat.
WILD THING 1
WILD THING 3
WILD THING 4
Hat Step 3: Assemble the Outer Fur Hat
Next, sew the outer fur hat. Repeat the same steps from step 2 above using the fur pieces.

Now you have two hats: an outer fur hat and a lining hat.
Hat Step 4: Add the Front flap Piece
a. Take the LINING front flap piece and sew it to the OUTER FUR hat with the right sides together.
b. Sew the OUTER FUR flap piece to the LINING hat with the right sides together.
Ensure that the pieces are sewn securely.

Hat Step 5: Joining the Hats
a. With the right sides facing each other, place the outer hat inside the lining hat, aligning the edges.
b. Pin around the edges to keep the fabrics in place.
c. Sew around the edges, leaving a 2-inch gap at the back bottom of the hat.
d. Carefully flip the hat right-side-out through the gap and tuck the lining inside the outer hat, ensuring it sits smoothly. Close the gap by either hand sewing with a needle and thread or using a sewing machine.

Hat Step 6: Secure the Front Flap
Now, it’s time to fold and secure the front flap of the hat.
a. Fold the front flap upward to the desired position on the hat.
b. Using a needle and thread, hand-stitch the top center of the front flap to the hat to hold it in place.
c. Make sure the stitches are secure, but try to keep them small and discreet for a clean finish.
d. Once sewn, check that the flap is firmly attached and lies evenly.

Step 7: Enjoy your new Wild Thing Hat

Congratulations on completing your Wild Thing hat! Click a button below to continue working on other costume pieces and accessories.
WILD THING 1
WILD THING 2
WILD THING 3
WILD THING 4
Wild Thing Hat Accessories
Horn Hat Accessory
Costumes: Wild Thing 1, Wild Thing 3
Horn Step 1: Preparing the Fabric
Start by laying out your horn fabrics on a flat surface. Place the printed pattern on top of each fabric, securing it with sewing pins.
You'll need to cut:
- 4 horn pieces total
- 2 pieces for each horn, cut as mirrored pairs (one piece should face forward and the other should face backward for each horn).

Horn Step 2: Assemble the Horns
With your fabric pieces cut, it's time to start sewing.
a. Take one horn piece and align it with the mirrored horn piece, right sides together.
b. Sew along the edges using a straight stitch with a 1/4" seam allowance.
c. Repeat this process with the other horn pieces. You should now have two horn shapes.

Horn Step 3: Turn Right Side Out & Add Filling
With both horn shapes sewn together, it’s time to turn them right side out.
a. Carefully flip each horn inside out, so the right side of the fabric is now on the outside. Use a blunt object like a pencil or chopstick to help push out the tip of the horn.
b. Once flipped, begin stuffing the horns with polyfill or your desired stuffing material. Be sure to stuff evenly and firmly, so the horns hold their shape.
c. Set the stuffed horns aside for the next step.

Horn Step 4: Close the Bottom Opening
a. Pinch the raw edges of the horn’s bottom opening, and use your sewing machine to sew along the edge. Repeat with the other horn. Once the bottoms are securely closed, set the horns aside to attach later.

If you are working on Wild Thing 3, you can skip sewing the ears. Click the button below to jump to the step for assembling the outer hat with the horns.
WILD THING 3
Ear Hat Accessory
Costume: Wild Thing 1
Ears Step 1: Preparing the Fabric
Start by laying out your ear fabric and ear lining on a flat surface. Place the printed pattern on top of each fabric, securing it with sewing pins.
You'll need to cut:
- 2 ear pieces from the outer fabric (mirrored)
- 2 ear pieces from the lining fabric (mirrored)

Ears Step 2: Assemble the Ears
With the pieces cut, it’s time to assemble the ears.
a. Place one fur piece and one liner piece together, with the right sides facing each other.
b. Sew along the edges, leaving the bottom open.
c. Repeat this step for the second ear.

Ears Step 3: Flip the Ears Right Side Out
a. Turn both sewn ears right side out so the right side of the fabric is on the outside.
b. Use a blunt object like a pencil to help shape the ears.

Ears Step 4: Shape and Sew the Ears Bottom
Next, you’ll shape the bottom of the ears.
a. Bunch the fabric at the bottom of the ear by folding the sides inward toward the middle, with the liner facing inside.
b. Sew across the bottom to secure the folds in place.
c. Repeat this step with the other ear.

Ears Step 5: Attach the Horn to the Ear
Finally, attach the horn to each ear.
a. Align the bottom of the horn with the fur side of the ear, making sure the horn is pointing upward.
b. Sew the horn securely to the ear.
c. Repeat with the other ear and horn.

Continue to assemble the hat with the ears and horns.
Assemble Hat Accessories
Hat Accessory Prep: Wild Thing 1 Center Strip Prep (Skip This step if you are not working on Wild Thing 1)
With the center strip outside fur fabric:
a. Fold in half lengthwise, with the right sides together.
b. Sew a 1/4" seam along the folded edge. This will create a parting seam to resemble the fur of the Wild Thing 1.
c. Once the seam is sewn, unfold the center strip and lay it flat.
d. Proceed to Hat Accessory Step 3 to assemble the fur hat and add in the ears and horns.
Hat Accessory Step 3: Assemble the Outer Fur Hat
With your hat accessory pieces (horn and ears) assembled it's time to start sewing the outer hat.
a. Take one side flap piece and align it with the center strip, with right sides facing each other. Position your hat accessory(s) between the side flap and the center strip, sandwiching it at the edge. Ensure the accessory(s) are oriented correctly before pinning in place.
b. Sew along the edges using a straight stitch with a 1/2" seam allowance.
c. Repeat this process with the other side flap piece and hat accessory(s), attaching it to the opposite side of the center strip. You should now have the shape of the hat.

FINISH THE HAT
Feather Hat Accessory
Costume: Wild Thing 4
Feather Step 1: Preparing the Fabric
Start by laying out your feather fabrics on a flat surface. Place the printed pattern on top of each fabric, securing it with sewing pins.
You'll need to cut:
- 8 feather pieces total
- 2 pieces for each feather, cut as mirrored pairs (one piece should face forward and the other should face backward for each feather).

Feather Step 2: Assemble the Feathers
With your fabric pieces cut, it's time to start sewing.
a. Take one feather piece and align it with the mirrored feather piece, right sides together.
b. Sew along the edges using a straight stitch with a 1/4" seam allowance.
c. Repeat this process with all the feather pieces. You should now have four feather shapes.

Feather Step 3: Turn Right Side Out & Add Filling
With all four feather shapes sewn together, it’s time to turn them right side out.
a. Carefully flip each feather right side out, so the right side of the fabric is now on the outside. Use a blunt object like a pencil or chopstick to help push out the tip of the feather.
b. Once flipped, begin stuffing the feathers with polyfill or your desired stuffing material. Be sure to stuff evenly and firmly, so the feathers hold their shape.
c. Set the stuffed feathers aside for the next step.

Feather Step 4: Close the Bottom Opening
a. Pinch the raw edges of the feather's bottom opening, and use your sewing machine to sew along the edge. Repeat with the other feathers. Once the bottoms are securely closed, set the feathers aside to attach later.

Continue to assemble Wild Thing 4 Hat
Feather Step 4: Attach Feathers to Hat
a. To add the feathers to your hat, start by cutting the outer fur centerpiece of the hat in half.
b. Place the hat pieces right sides together, with the feathers sandwiched between the two pieces.
c. Resew the center of the hat together using a ¼” seam allowance. Make sure to sew through all the layers (hat left, feathers, hat right).
d. Hand sew a few stitches at the base, in between the feathers, to help them stand upright and stay in a neat line.

Continue sewing and assembling the hat with your modified fur centerpiece.
FINISH THE HAT
Wild Things Claws
Costumes: Max, Wild Thing 3, Wild Thing 4
Claws Step 1: Preparing the Fabric
Start by laying out your claw fabric on a flat surface. Place the printed pattern on top of each fabric, securing it with sewing pins.
You'll need to cut:
- claws (refer to costume description)
- 2 pieces for each claw, cut as mirrored pairs (one piece should face forward and the other should face backward for each claw).

Claws Step 2: Assemble the Claws
With your fabric pieces cut, it's time to start sewing.
a. Take one claw piece and align it with the mirrored claw piece, right sides together.
b. Sew along the edges using a straight stitch with a 1/4" seam allowance.
c. Repeat this process with the other claw pieces. You should now have eight claw shapes.

Claws Step 3: Turn Right Side Out
With all claw shapes sewn together, it’s time to turn them right side out.
a. Carefully flip each claw inside out, so the right side of the fabric is now on the outside. Use a blunt object like a pencil or chopstick to help push out the tip of the claw.
b. Set the claws aside for the next step.

Claws Step 4: Close the Bottom Opening
a. Pinch the raw edge of the claw's bottom opening, and use your sewing machine to sew along the edge. Repeat with the other claws. Once the bottoms are securely closed, set the claws aside to attach later.

Claw Step 5: Attach the Claws to the Slippers
Now that your claws are ready, it’s time to attach them to the slippers.
a. Position the four claws evenly along the front edge of the slipper.
b. Using a needle and thread, hand-stitch each claw securely to the slipper. Be sure to stitch through both the claw base and the slipper fabric for stability.
c. Once all claws are attached, check that they are evenly spaced and securely fastened.
d. Trim any excess thread and tuck it away for a clean finish.

Congratulations on completing your Wild Thing claws! Click a button below to continue working on other costume pieces and accessories.
MAX
WILD THING 3
WILD THING 4
Long Tail
Costumes: Max, Wild Thing 3
Long Tail Step 1: Preparing the Fabric
Start by laying out your long tail fabric on a flat surface. Place the printed pattern on top of your fabric, securing it with sewing pins.
You'll need to cut:
- 2 long tail pieces, cut as mirrored pairs (one piece should face forward and the other should face backward for each tail).

Long Tail Step 2: Assemble the Long Tail
With your fabric pieces cut, it's time to start sewing.
a. Take one long tail piece and align it with the mirrored long tail piece, right sides together.
b. Sew along the edges using a straight stitch with a 1/2" seam allowance.

Long Tail Step 3: Turn Right Side Out & Add Filling
With the long tail sewn together, it’s time to turn it right side out.
a. Carefully flip the long tail inside out, so the right side of the fabric is now on the outside. Use a blunt object like a pencil or chopstick to help push out the tip of the long tail.
b. Once flipped, begin stuffing the long tail with polyfill or your desired stuffing material. Be sure to stuff evenly and firmly, so the long tail holds its shape.
c. Set the stuffed long tail aside for the next step.

Long Tail Step 4: Close the Bottom Opening
a. Pinch the raw edge of the long tail's bottom opening, and use your sewing machine to sew along the edge. Once the bottom is securely closed, set the long tail aside to attach later.

Long Tail Step 5: Attach the Long Tail to the Pants
Now that your long tail is ready, it’s time to attach them to the pants.
a. Position the long tail at the center of the back of the pants just above the seat of the pants.
b. Using a needle and thread, hand-stitch the long tail securely to the pants. Be sure to stitch through both the long tail base and the pants fabric for stability.
c. Once the long tail is attached, check that it is securely fastened.
d. Trim any excess thread and tuck it away for a clean finish.

MAX
WILD THING 3
Duck Tail
Costumes: Wild Thing 1, Wild Thing 2
Duck Tail Step 1: Preparing the Fabric
Start by laying out your duck tail fabric and interfacing on a flat surface. Place the printed pattern on top of your fabric and firm interfacing, securing it with sewing pins.
You'll need to cut:
- 2 fur fabric duck tail pieces, cut as mirrored pairs (one piece should face forward and the other should face backward for each feather)
- 1 piece of firm interfacing

Duck Tail Step 2: Assemble the Duck Tail
With your fabric pieces cut, it's time to start sewing.
a. Take one fur fabric duck tail piece and align it with the mirrored fur fabric duck tail piece, right sides together.
b. Sew along the edges using a straight stitch with a 1/2" seam allowance.

Duck Tail Step 3: Turn Right Side Out
With the long tail sewn together, it’s time to turn it right side out.
a. Carefully flip the duck tail right side out, so the right side of the fabric is now on the outside. Use a blunt object like a pencil or chopstick to help push out the tip of the tail.
b. Set the duck tail aside for the next step.

Duck Tail Step 4: Prepare the Interfacing
a. Take the firm interfacing and fold it in half.
b. Use an iron to press and crease the interfacing.
c. Unfold the interfacing.

Duck Tail Step 5: Insert the Interfacing
a. Fold the interfacing so that it fits inside the fur duck tail piece.
b. Open it back up and make sure it is evenly distributed and lays flat between the fur layers.

Duck Tail Step 6: Close the Bottom Opening
a. Pinch the raw edge of the duck tail's bottom opening, and use your sewing machine to sew along the edge. Once the bottom is securely closed, set the duck tail aside to attach later.

Duck Tail Step 7: Attach the Duck Tail to the Pants
Now that your long tail is ready, it’s time to attach them to the pants.
a. Position the long tail at the center of the back of the pants just above the seat of the pants.
b. Using a needle and thread, hand-stitch the long tail securely to the pants. Be sure to stitch through both the long tail base and the pants fabric for stability.
c. Once the long tail is attached, check that it is securely fastened.
d. Trim any excess thread and tuck it away for a clean finish.

WILD THING 1
WILD THING 2


0 Comments